
Table of Contents

Assessment – As a crafty, gadgety kind of man or woman, I have always sort of preferred a 3D printer, but I’ve under no circumstances definitely had just about anything I have actually necessary to print. In essence, I lacked a venture. Enter my son. He decided he wanted to make an acoustic levitator and apparently it involves printing some components. What is an acoustic levitator? I have no strategy, but I was pleased to have an justification to get the Creality CR-10 Wise 3D Printer and test it out!
What is it?
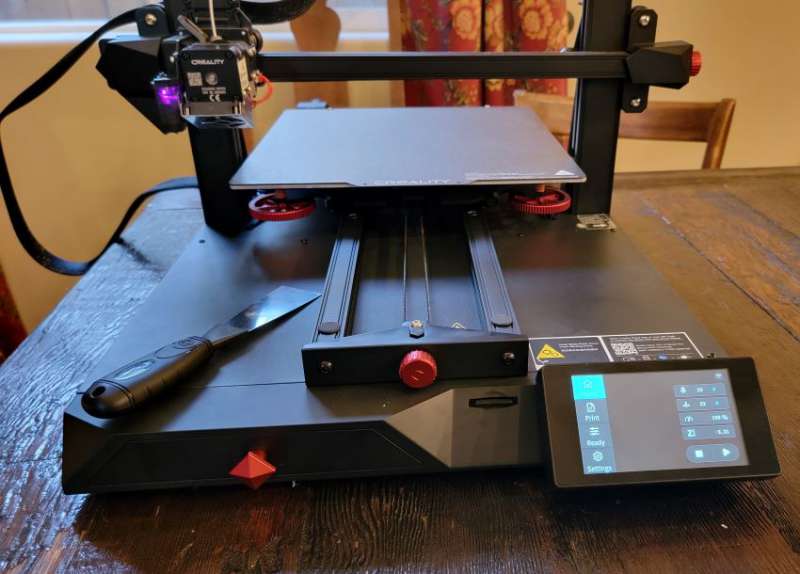
The Creality CR-10 Wise 3D Printer is a self-leveling bigger sized 3D printer that characteristics computerized leveling (soon after an initial leveling).
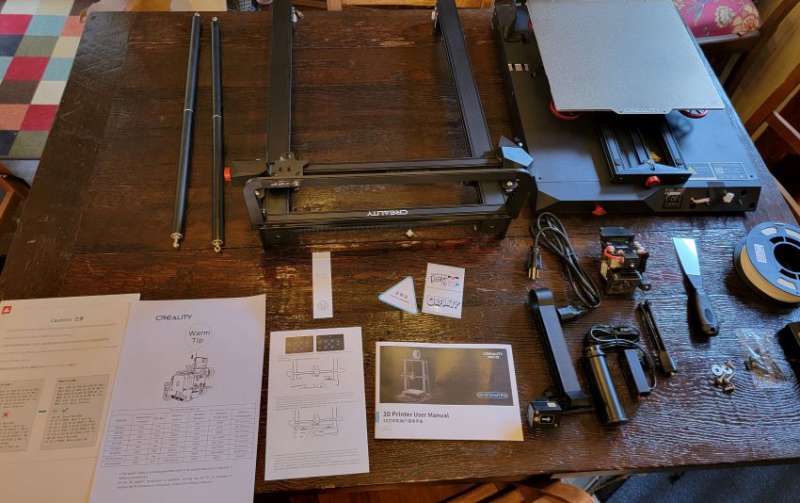
What’s in the the box
- The 3D Printer in many parts
- A spool of filament
- Some equipment to put it jointly
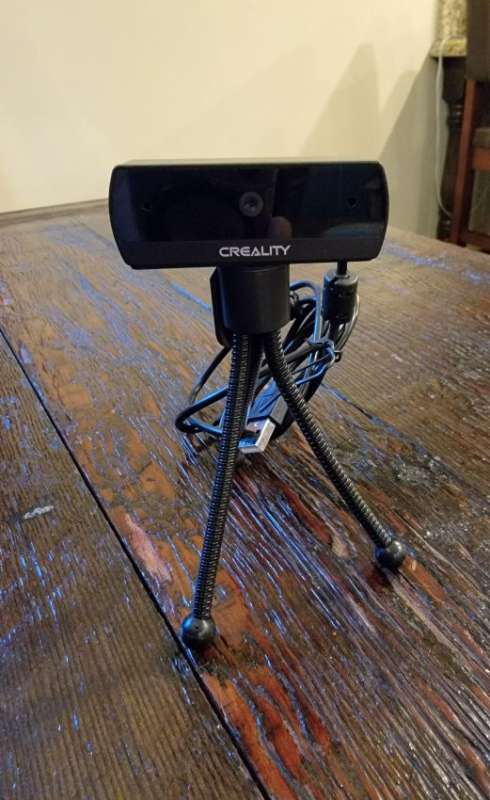
- A digital camera
- A tiny tripod
- A scraper spatula
- Instruction manual
- A leveling card with instructions on leveling for the first time
- A temperature chart for using diverse supplies
- Other assorted literature (a certificate, some warnings, stickers, and so on)

Requirements
- Print measurement: 300 x 300 x 400mm
- Item measurement: 578 x 522 x 648mm
- Net body weight: 14kg
- Slicing software program: Creality/Cura
- Printing precision: +-.1mm
- Nozzle diameter: .4mm
- Extrusion system: Extrusion
- Hot Bed Temp: < 100 degrees C
- Nozzle Temp: < 260 degrees C
- Layer Height: 0.1mm-0.4mm
- Printing platform: Carborundum glass
- Maximum Power Consumption: 350W
- Power requirement: 110-240V DC 24V
- Supported materials: PLA/ABS/TPU/PETG
- Filament diameter: 1.75mm
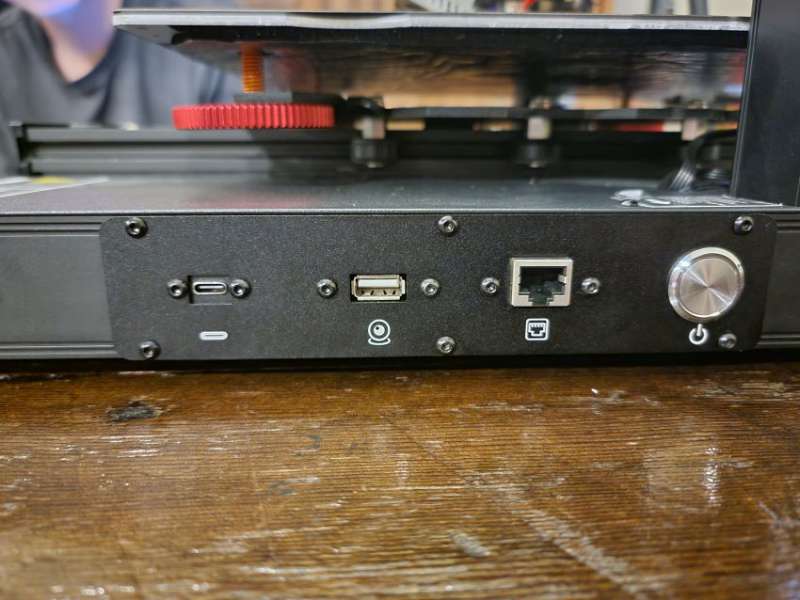
- Print Mode: SD card/WIFI
Setup
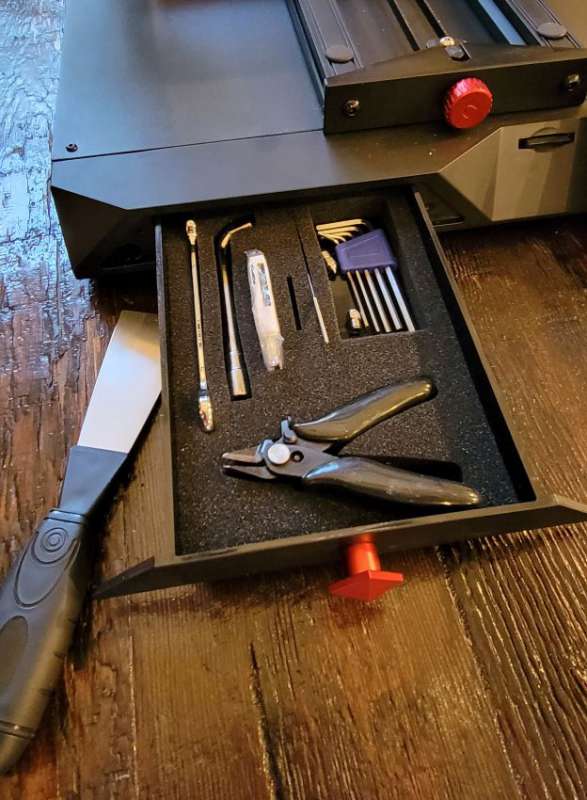
The Creality CR-10 Smart 3D printer arrived in a very large but very well packed and protected box. My son is my assembler, and since he is the one who wanted a 3D printer, he was in charge of putting it together. The modular structure made it a snap to assemble, although the instructions don’t really specify where to find the toolbox very well. My son saw the tool list and thought that was what we’d have to find among our own tools and so he said it took about 40 minutes to put together, but that included 30 minutes of hunting to find all the tools in our workshop. After we had it put together for a couple of days, he pulled on a knob on the front and found the toolbox with all the tools you’d need. The instructions say assembly takes about 8 minutes and that sounds about right if you find the toolbox first!
Features
This printer will support a wired (RJ45), a WLAN and a WiFi connection, so right away my son tried to hook it up to our WiFi. The instructions offer several methods, but he wound up having to do it through his phone, which I don’t blame on the printer – our WiFi has been a bit tricky lately. He loaded the app and used that to connect.
I confess I was a little worried that this thing would just confuse me and my son would have to bail me out if anything went wrong, sort of like I sometimes have to do when my mom has a computer problem. That wasn’t an issue though. The app and the touch screen on the front of the machine are very intuitive and didn’t give us any problems.
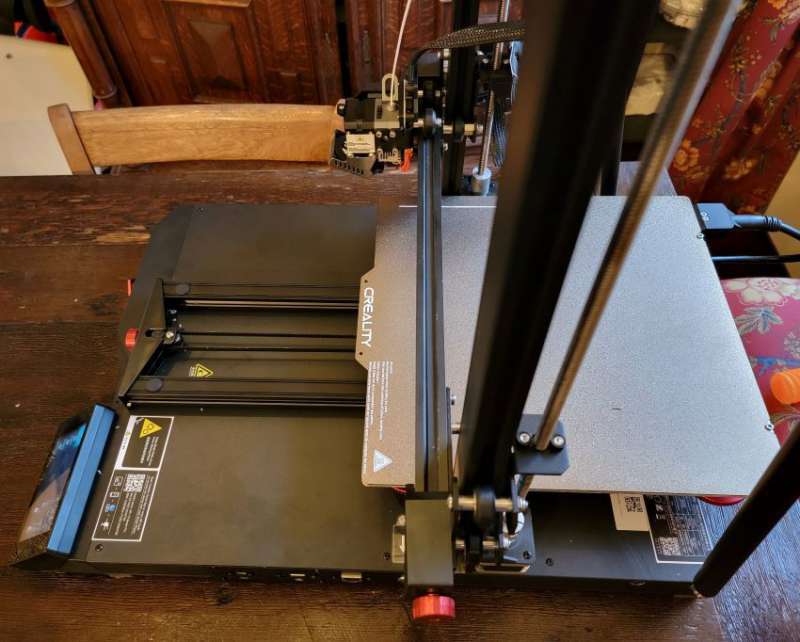
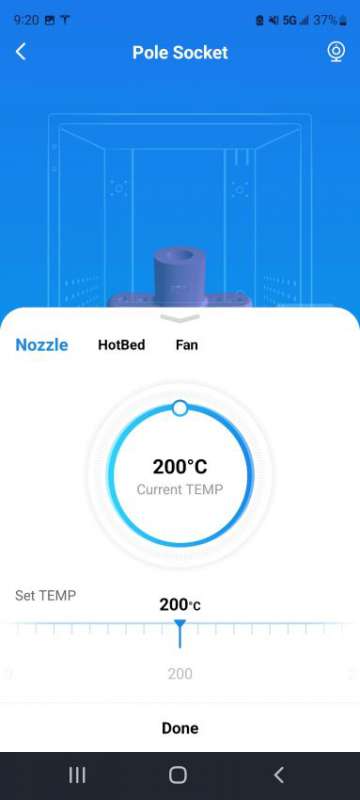
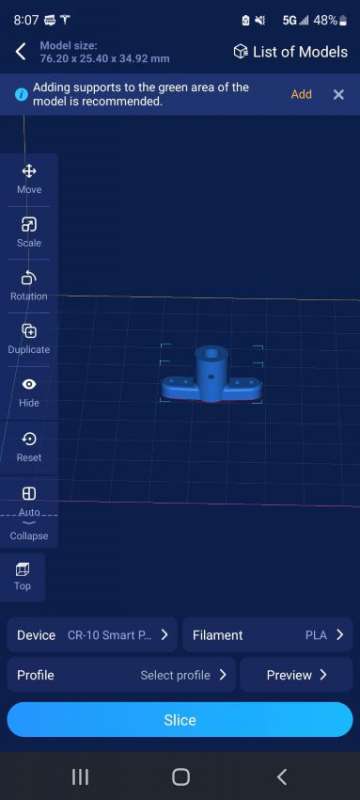
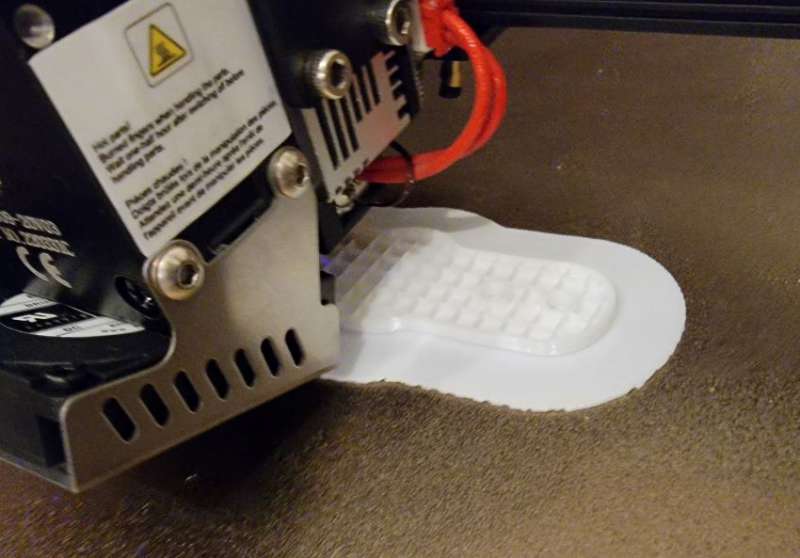
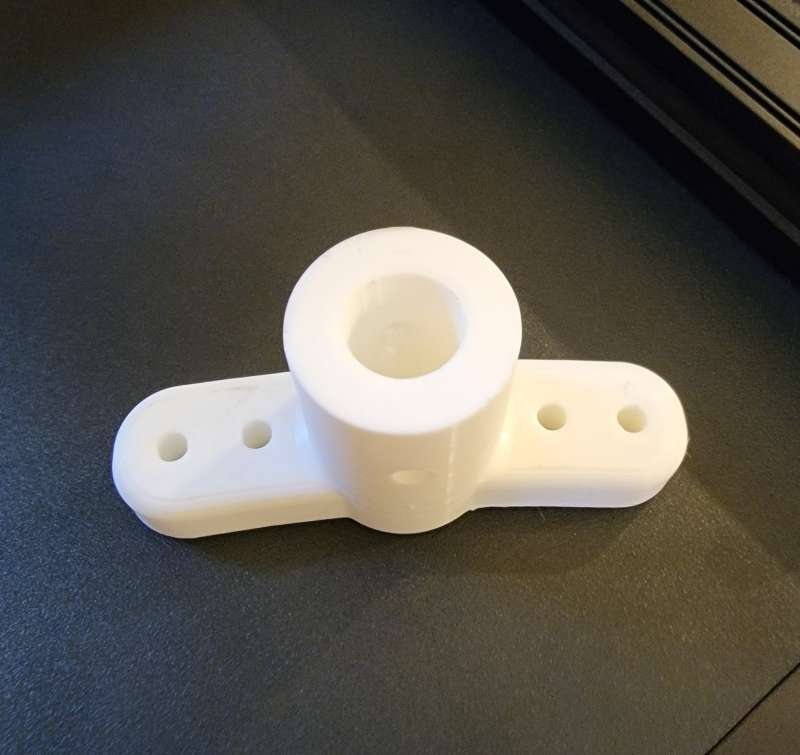
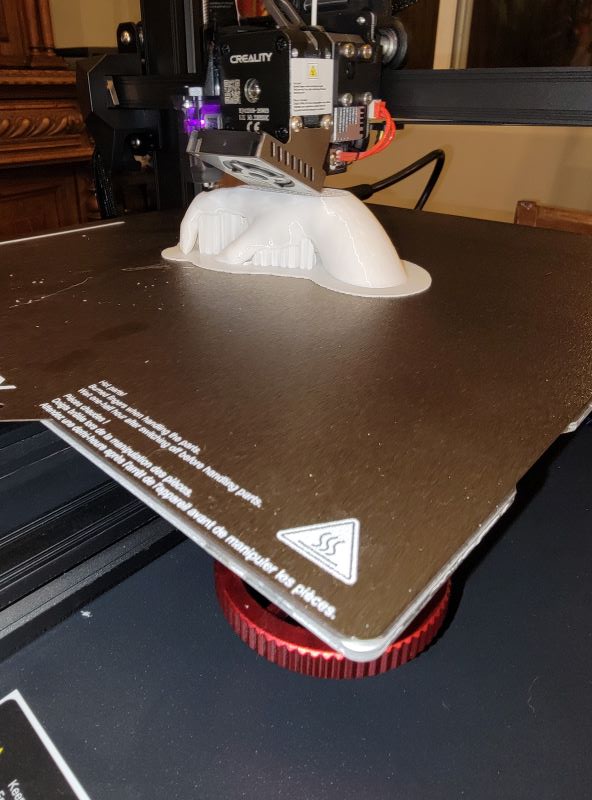
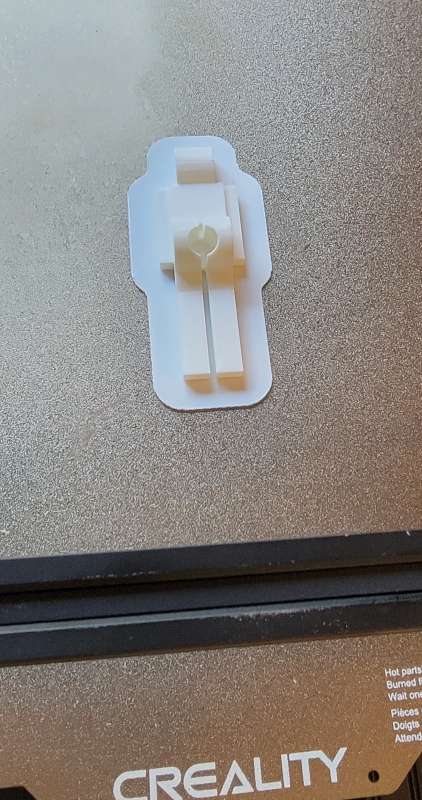
The literature recommends using the Creality slicing software but includes special directions in case you don’t want to do that. We used the app and my son chose to make a pole bracket as his test project. It’s small and doesn’t really take advantage of the fact that you can do a pretty big project with this printer, and we didn’t really need a pole bracket, but I didn’t argue because I was planning on taking over once we knew how this thing worked. The maximum print size for this printer is 300mm x 300mm x 400mm, which is about 11.8 x 11.8 x 15.7 inches for those who, like me, are metrically challenged.
Before you can actually print, though, you have to level. The Creality CR-10 Smart 3D printer features intelligent auto leveling, but before you can take advantage of that, you have to initially level the machine. It took a couple of tries for us to get it right, but I would say that if you knew what you were doing you wouldn’t have any trouble. It wasn’t a difficult process even for us and it didn’t take very long. Once you do the initial leveling the auto level feature will allow you to instantly print, which is a nice feature, especially since you can print remotely through the app.
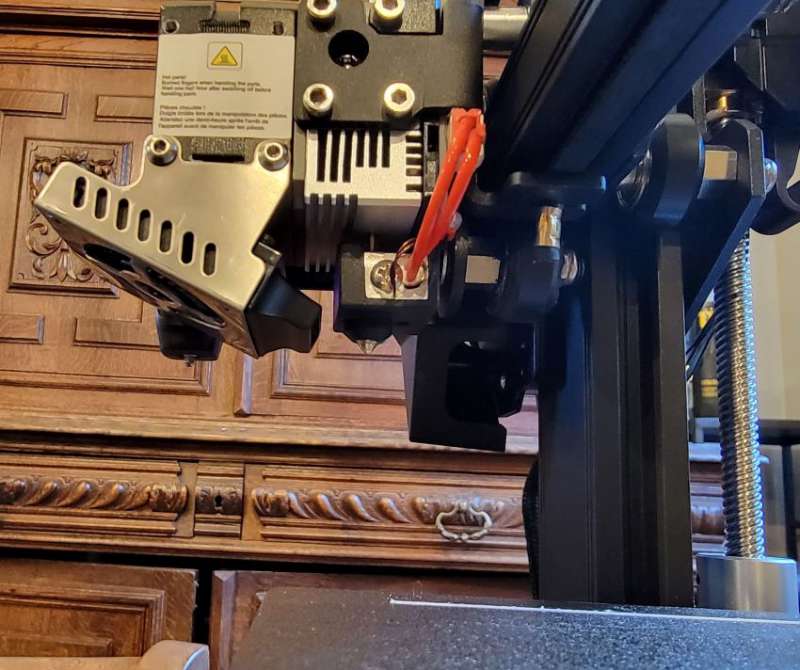
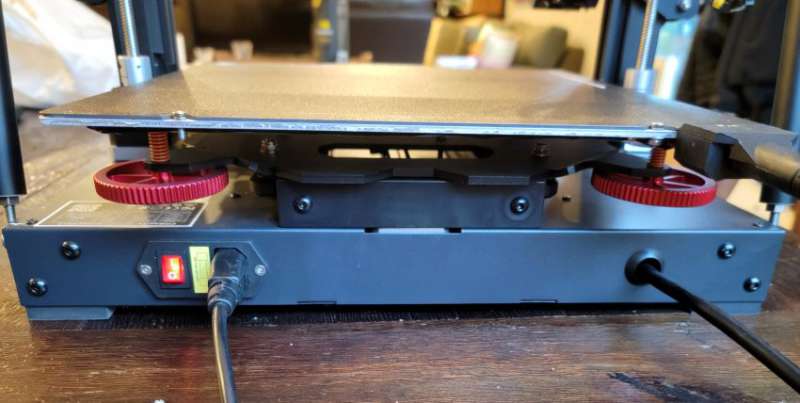
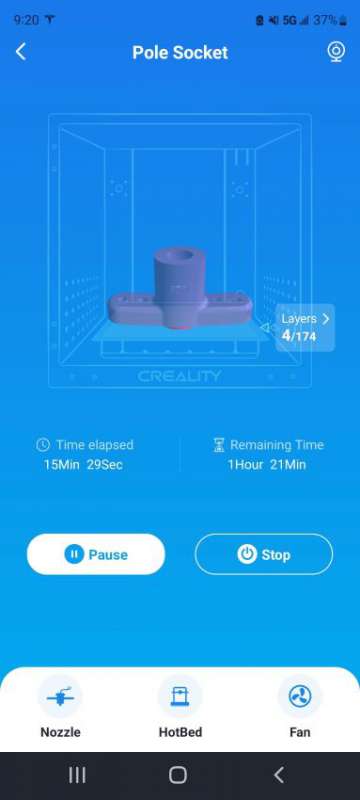
The body of the printer is aviation grade aluminum, so it’s strong and light. The hot bed has 16 load bearing pillars and the Dual Z axes and dual diagonal drawbars are all meant to enhance precision. It also claims to be quieter than some other machines at less than 45 dB while it’s printing. That’s about as loud as your refrigerator when it runs, so it’s probably not going to keep anyone up at night if you leave it to print a big project. It also automatically goes into a low power mode if it isn’t being used to save energy. All 3D printing is time consuming, and this small pole socket took about 90 minutes to print.
At first, we were kind of confused by the little webcam and tripod they include. They aren’t covered in the instructions at all, but we figured out that the app lets you use the printer remotely and the camera and tripod would allow you to watch your project as it is being printed. Since this was our first time 3-D printing, we didn’t do anything that fancy on this particular project. If you use auto leveling, I suppose you could pick a project while you’re at work, start it, watch it through your phone and come home to a finished piece!
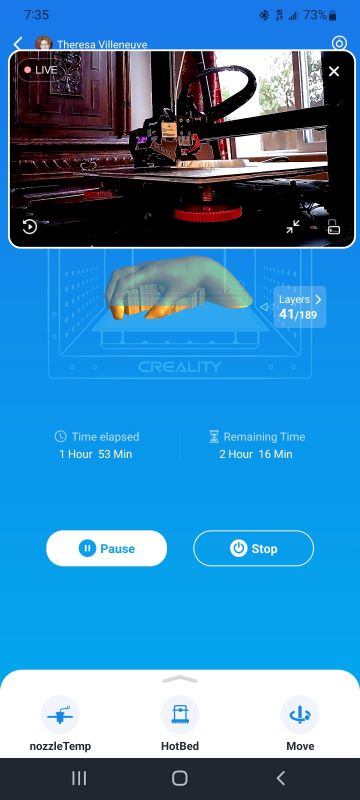
After we had our test project done, I decided I should take a look at what I could make. I am a little intimidated by some technology, but I guess I shouldn’t be. After all, I’m Gen X. We are the generation that figured everything out on our own! I downloaded the app and was really blown away by all the cool stuff I could make! I started with something called “The Creepy Hand.” It is just a hand (and I really wish it was bigger…maybe I need to figure out how to make it larger) that I thought could be used in some way as a Halloween decoration. I set it to print and the first one was kind of messed up because I didn’t have the “support” setting clicked, but our second one turned out great and definitely creepy. I connected the little camera they sent to the USB port and I was able to check on the progress of it as well.
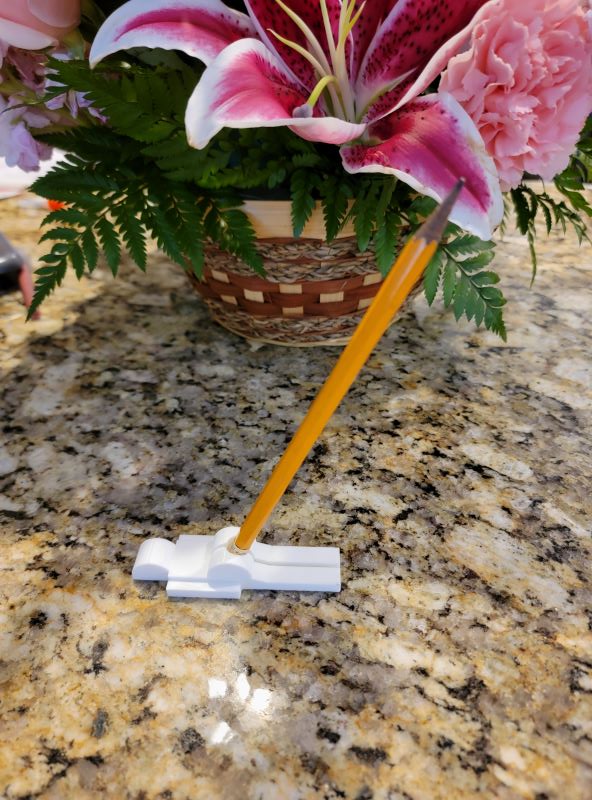
Next I decided to make a slightly offensive (or funny) pencil holder. Sadly, through my job I have learned that adults will do almost anything in a group setting if there’s a prize. Any prize. I once saw a grown woman in a “team building exercise” practically limbo under a desk for a Chapstick emblazoned with the local credit union logo. Anyway, the point is, I need prizes for my students that are cheap and cheerful, so I thought maybe they might appreciate this as one of their choices. I have to say, he printed up really quick and I’m going to use him on my desk at work. He goes with a few other of my office trinkets, which are also slightly offensive.
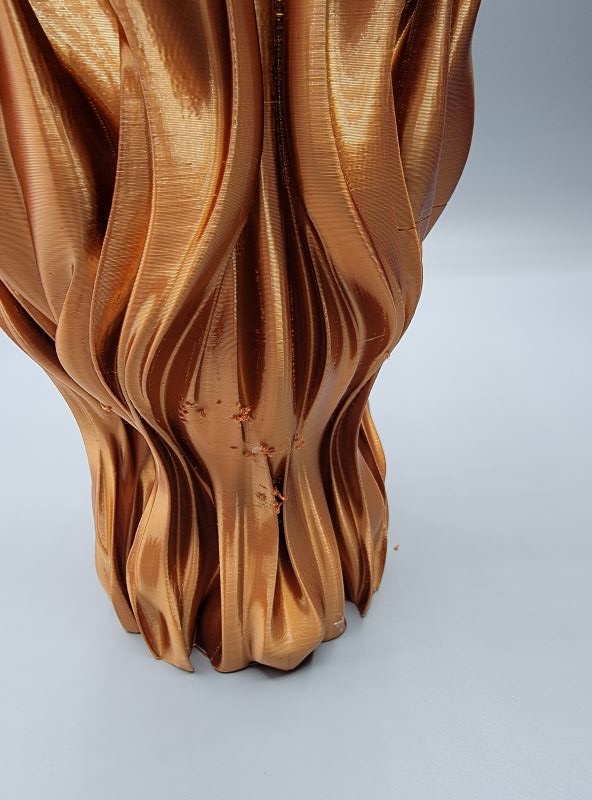
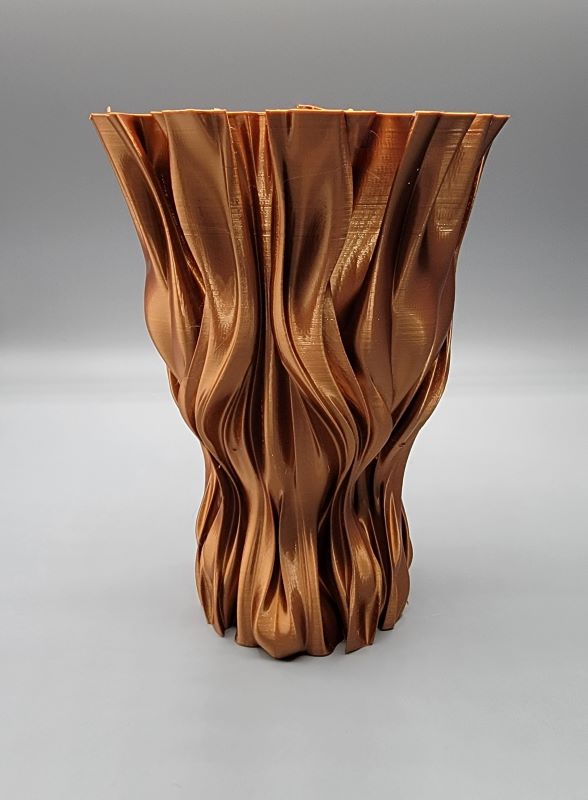
Then I went for something more ambitious. I decided to print a super fancy vase. By this time I had run out of the filament that came with the printer and I found out that the machine just stops and waits for you to reload, which is a nice feature, but it doesn’t “go to sleep” to save energy in the meantime in this situation, so I scrapped the vase that was started and started a new one once my new filament arrived. After a day of printing I noticed a setting called “vase mode”. I plan on trying that out in the future, though, because my vase has quite a bit of support inside that I need to hollow out and I’m wondering if “vase mode” cuts back on that task. I have a rotary tool that I can use that should make that pretty easy though. Either way, it’s a pretty cool looking vase and I think the copper coloring really hides the fact that it’s plastic. I think it looks great! There was only one area on the side where things got a bit gummed up, but I think with a little nipping and filing, no one will be able to tell.

Although I’m clearly learning about all the features and settings of the Creality CR-10 Smart 3D printer, I really am surprised by how easy it is to find a cool project on the app and then just click and a day or two later you have a finished project. It really is that easy once you have everything set up. I haven’t tried designing anything yet, and I don’t know that I ever will. I am very satisfied building other people’s creations. I think my son will have to design some stuff to make his acoustic levitator, and I’ll be interested to see how difficult that is to do.
What I like
- Auto leveling
- Easy to use machine and app
What I would change
- Maybe make clearer instructions that explain there’s a toolbox
Final thoughts
I was really surprised at how easy it was for us to get the Creality CR-10 Smart 3D printer put together and start printing. We really didn’t have any road bumps, so if you’ve been on the fence but worried that you might not be able to figure it out, don’t be. If the two of us newbs can do it, anyone can!
Check out our other Creality 3D printer reviews.
Price: $499.00
Where to buy: Creality and Amazon
Source: The sample for this review was provided by Creality.


More Stories
The Brilliant Evolution of Smartphone Technology That’s Transforming Everyday Life
The Dazzling Rise of Wearable Tech Fashion: How Smart Style is Redefining Modern Elegance
Cloud Comfort: How Cloud Computing Simplifies Your Digital Life